
Connecting HANA Live to SAP Analytics Cloud and SAP BusinessObjects (Part 1)
August 27, 2020 by: David LaiBeing able to connect to a live HANA connection via SAP Analytics Cloud or SAP BusinessObjects is important, as query processing is all done on the HANA engine rather than SAC or SAP BOBJ.
To accomplish this, you will need to setup SSL capabilities on the HANA side, setup correct user authorization, and then setup the connections on SAC and SAP BOBJ. Unfortunately, this is not so straight forward and although there is documentation, I could not find any end to end instructions.
This article is Part 1 of a 3-part series, which will go through the HANA setup, then the SAP BusinessObjects and SAP Analytics Cloud setup.
Below contains step by step instructions on the HANA setup portion from my environment.
Step 1: SAP XSEngine
Ensure that you can get to the SAP XSEngine webpage on both http and https.
If SSL has not been setup, you will see that there is a warning mentioning that the site is Not secure.

By default, it is setup as
http://<SAPLocalHost>:<80><instance number>
https://<SAPLocalHost>:<43><instance number>
You can modify the hostname and port through HANA Studio by logging in as a System user, but generally it is okay to keep it as the default.
In HANA Studio, double click on the appropriate system. Under the Configuration tab, go to xsengine.ini -> public_urls
You can then modify http_url and https_url if needed

Step 2: Configure HTTPS (SSL) for Client Application Access
Configure SAP Web Dispatcher to use HTTPS (SSL) for incoming request from UI front ends and applications (SAP Analytics Cloud, SAP BusinessObjects).
1.Ensure that the CommonCryptoLib library (libsapcrypto.so) is installed.
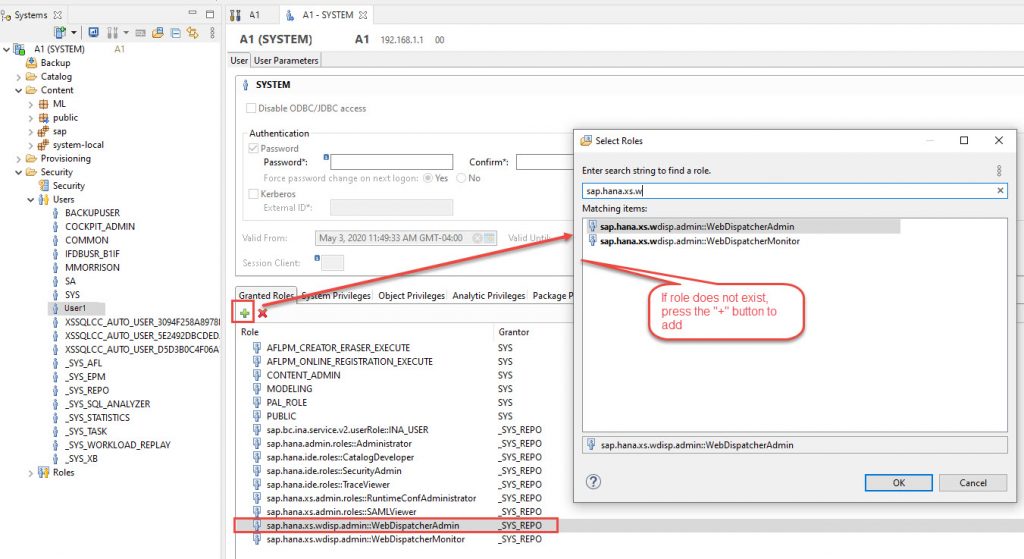
2. Ensure the user logging into the Web Dispatcher tool has the role template sap.hana.xs.wdisp.admin::WebDispatcherAdmin
In our example we will be using the user “User1”
3. Log into the Web Dispatcher Admin app with the user you granted privileges to.
http://<hostname>:80<instance#>/sap/hana/xs/wdisp/admin/public/default.html

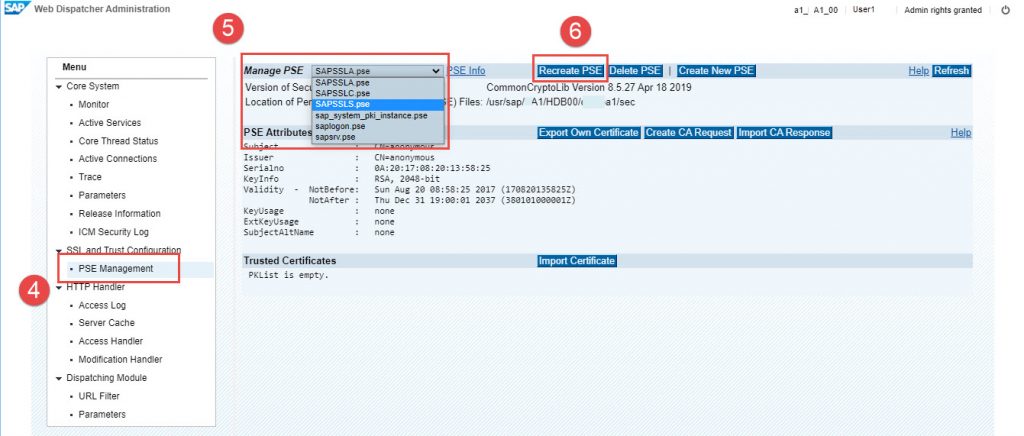
4. Click on PSE Management from the left side menu
5. From the Manage PSE dropdown, select SAPSSLS.pse to setup the Server Certificate
6. Click on Recreate PSE
7. In the Distinguished Name input box, enter the following where webserver.example.com is your hostname
CN=webserver.example.com, OU=HANA, O=SAP, C=DE, DNS=webserver.example.com

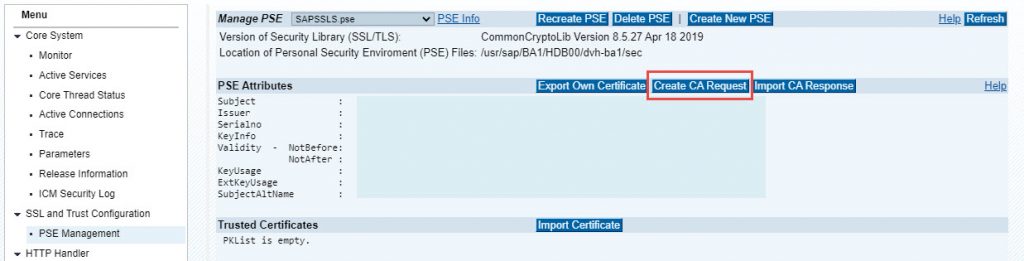
8. Click on Create CA Request
9. Copy the CA Request and send it to a valid certificate signing authority.
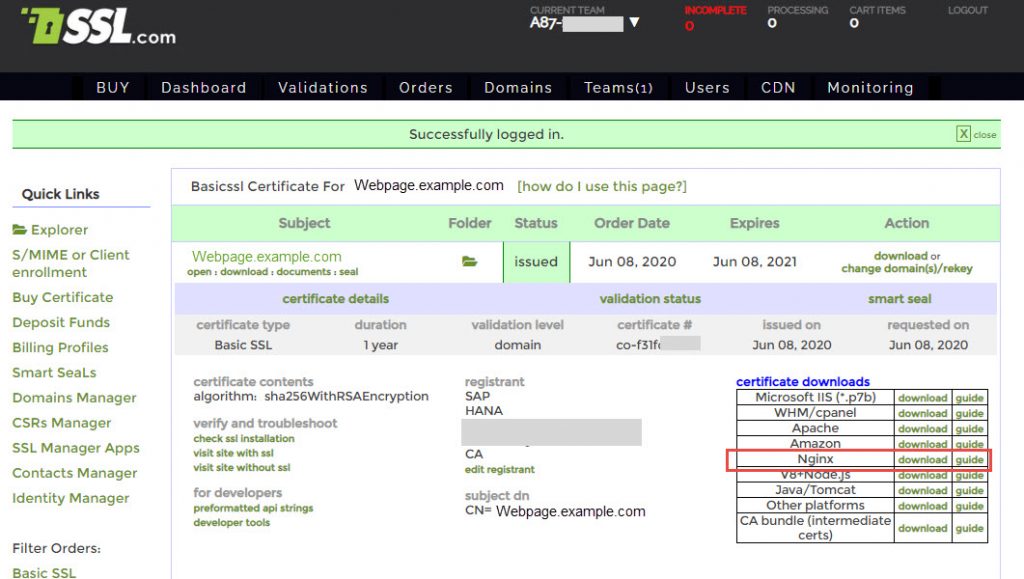
I used https://secure.ssl.com as my signing authority
If you choose to use securessl.com, please ensure you download the Nginx version in order for the response certificate to work. Intuitively you would choose Java/Tomcat, but that one doesn’t work (well at least on my end).
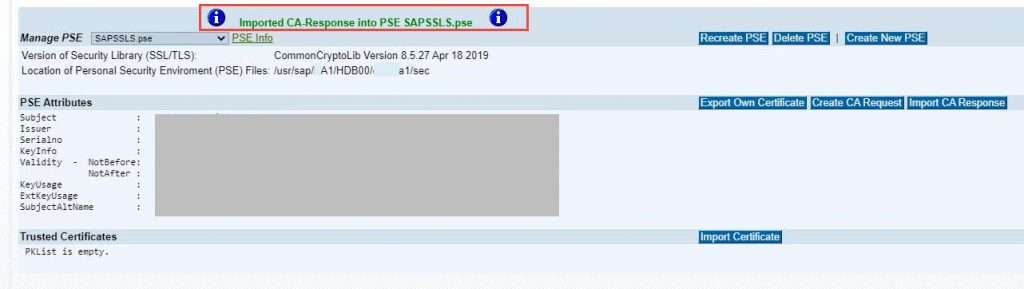
10. After you paste the response certificate into the Import box, click on Import

11. You should then receive a success message once the certificate has been imported
12. Now let us test to make sure SSL works by going to the xsengine default page
https://<SAPLocalHost>:<43><instance number>
You can see in the screenshot below that we no longer have the Not Secure warning

Step 3: SAP HANA Info Access Service (INA) configuration
The next step is to configure SAP HANA Info Access Service.
1.First go to HANA Studio and check if HCO_INA_SERVICE has been deployed
If it has not been deployed, then we will need to import the service
Deploying HCO_INA_SERVICE
NOTE: Skip this section if the service has already been deployed!
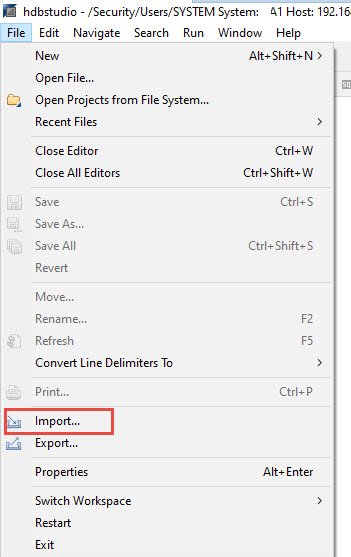
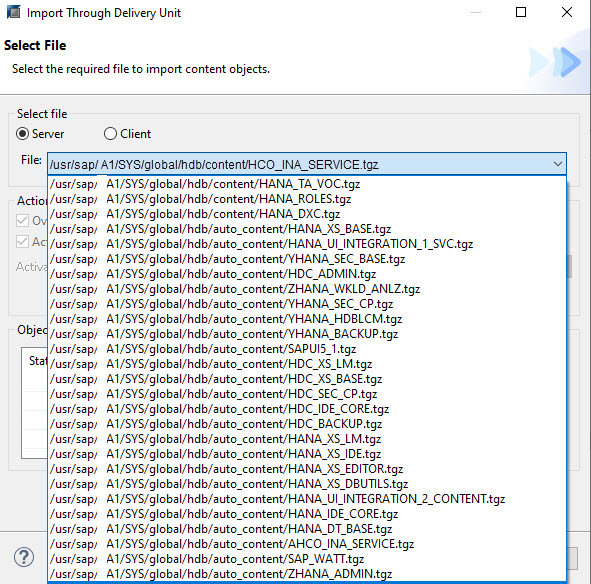
a. In the HANA Studio menu, click on File -> Import
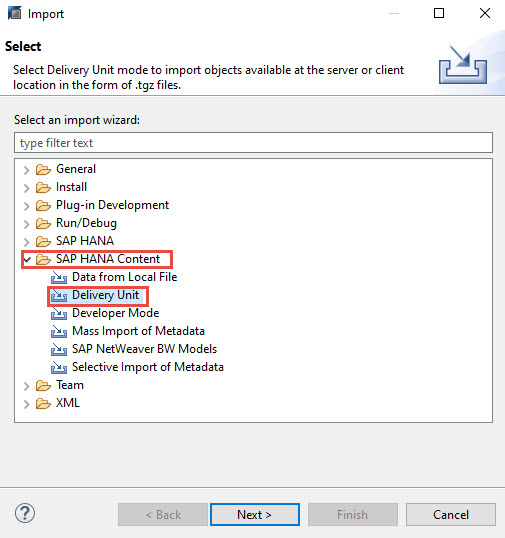
b. Select SAP HANA Content -> Delivery Unit
c. Select your target system
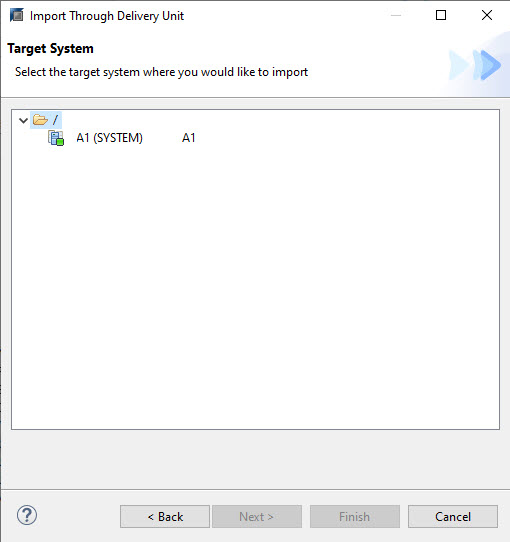
d. Select the HCO_INA_SERVICE.tgz and then click on Finish
Security Setup
Now that the HCO_INA_SERVICE has been installed; we need to make sure all necessary authorizations are in place
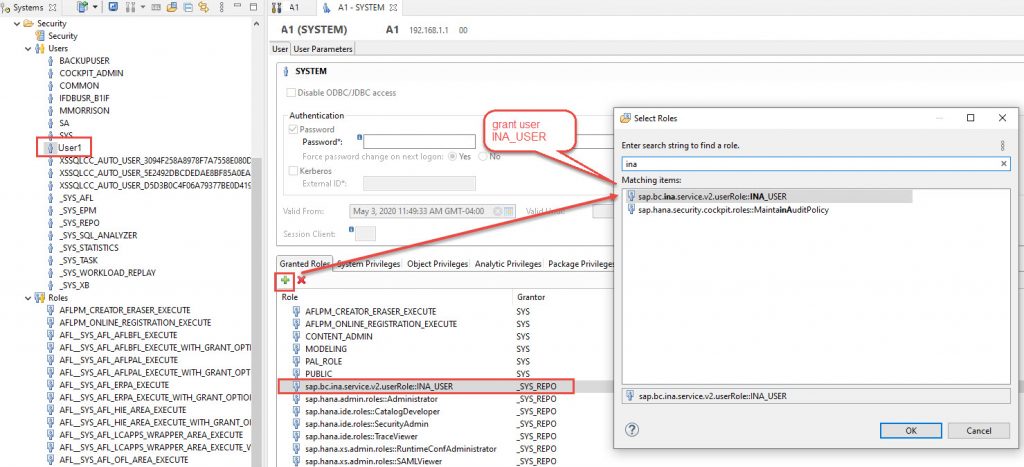
a. First, we will grant the role INA_USER to the HANA user that we are using for HANA Live connections.
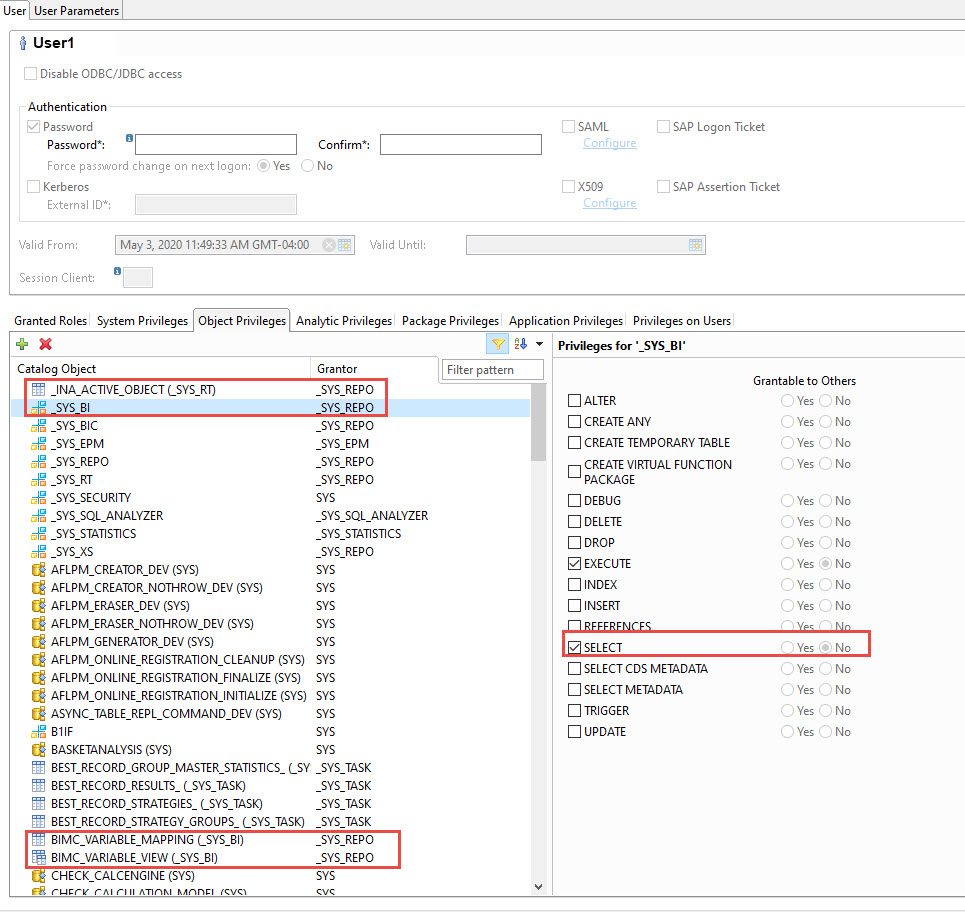
b. In addition we need to grant SELECT privileges for all the following objects
- Schema _SYS_BIC
- Table BIMC_VARIABLE_MAPPING in _SYS_BI
- Table BIMC_VARIABLE_VIEW in _SYS_BI
- Table _INA_ACTIVE_OBJECT in _SYS_RT
Step 4: CORS Configuration InA Service (XS)
Finally, we need to enable Cross-Origin Resource Sharing (CORS) for the InA service.
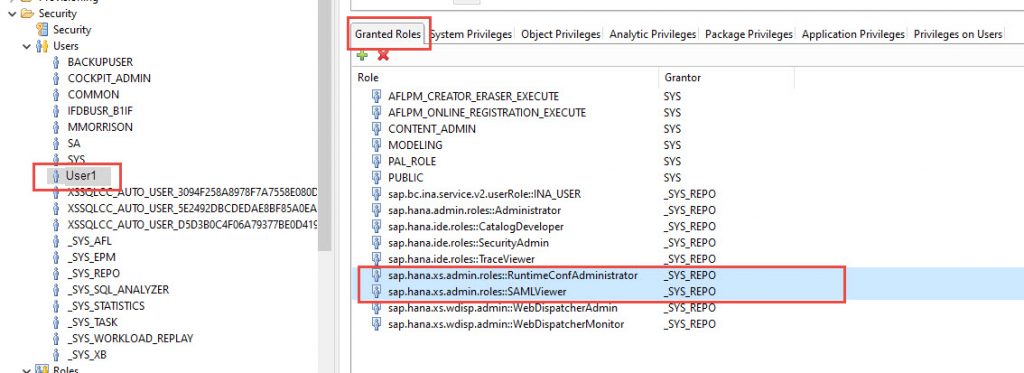
1.Select a user who will be logging into XS Admin and assign the roles sap.hana.xs.admin.roles::RuntimeConfAdministrator and sap.hana.xs.admin.roles::SAMLViewer
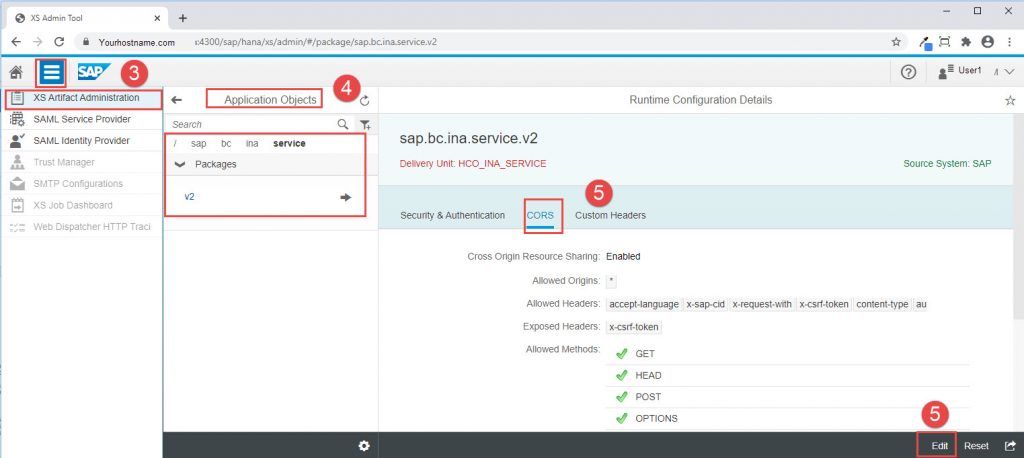
2. Log into SAP HANA XS Admin page (https://<hostname>:43<instance #>/sap/hana/xs/admin)

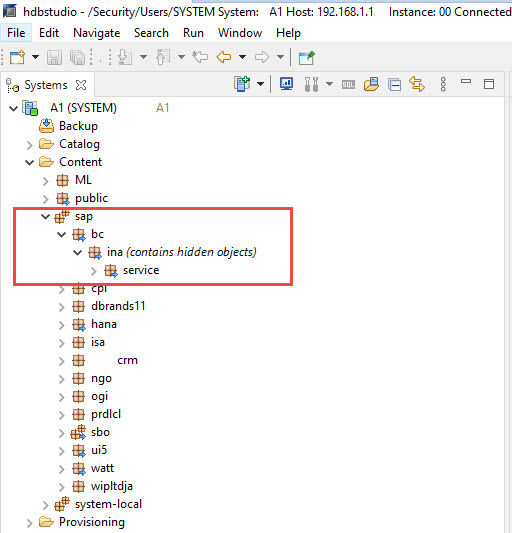
3. Open the XS Artifact Administration panel.
4. On the Application Objects window, traverse to sap -> bc -> ina -> service -> v2
5. Switch to the CORS area and click on Edit
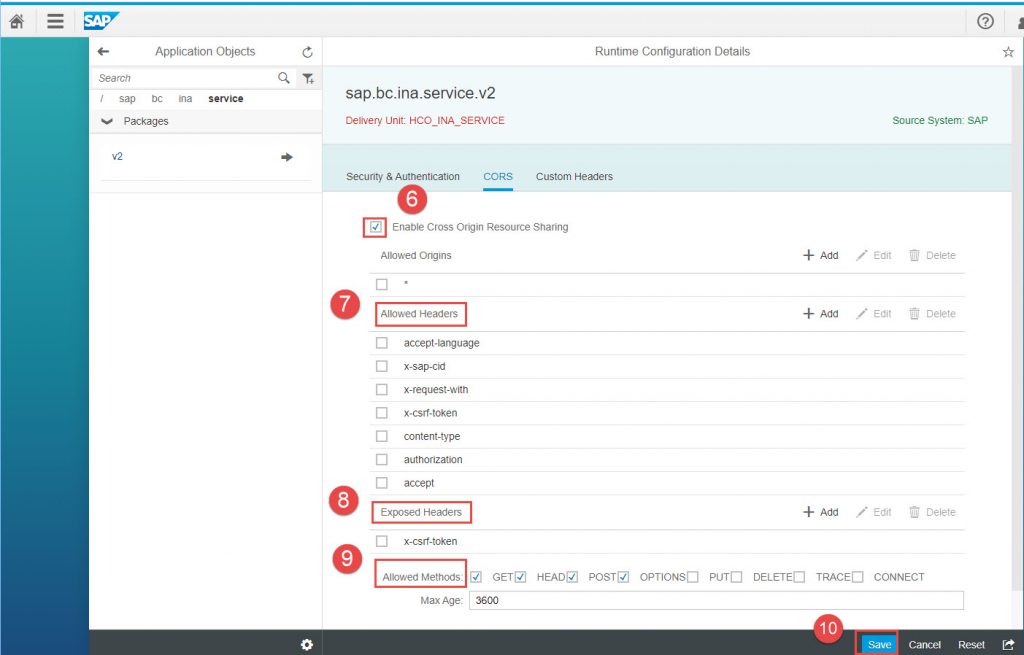
6. Check Enable Cross Origin Resource Sharing
7. Add the following headers to Allowed Headers
- Accept-language
- X-sap-cid
- X-request-with
- X-csrf-token
- Content-type
- Authorization
- Accept
8. Add the following header to Exposed Headers
- x-csrf-token
9. Check the following Allowed Methods
- GET
- HEAD
- POST
- OPTIONS
10. Click on Save
Step 5: Increase session timeout for the SAP HANA XS server
This step is optional, but it is a good idea to increase the timeout settings for the SAP HANA XS server.
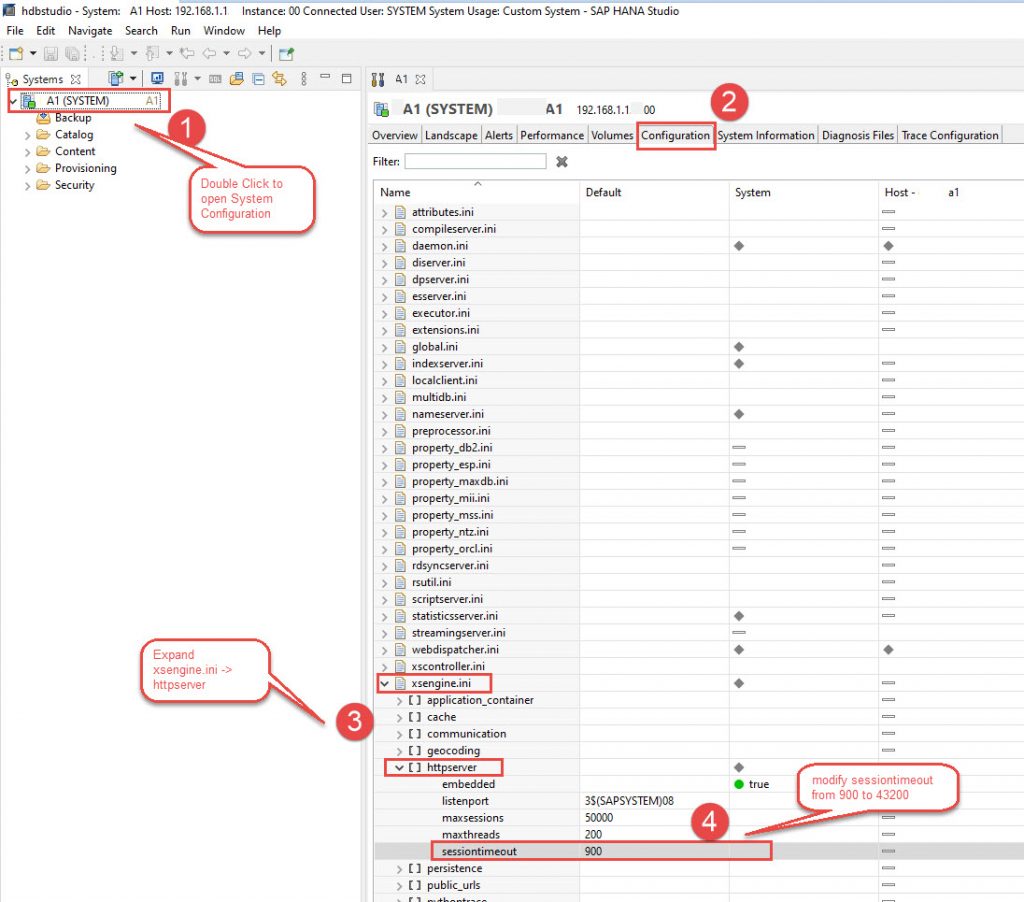
1.Open HANA Studio and double click on your system, which will bring up the System settings.
2. Go to the Configuration tab
3. Expand xsengine.ini -> httpserver. You will see the default for sessiontimeout is 900
4. Double click and change the value to 43200 which is equivalent to 12 hours
In the next part of our series, we will talk about creating a Live HANA connection in SAP BusinessObjects


Greeting, David,
I bought your book “Xcelsius Dashboard” (vision. 1st) years ago, learning a lot and working on two project here in Washington, DC. It has been “Clouding” everything currently and I am glad that you are here, publishing useful instructions. Really looking for your part 2 and 3 in the near future.
Henong Pan
Thanks Henong.
Part 2 and Part 3 are being released today 🙂